A Workflow for Finding and Preserving Your Images
Your photographs are not just files and folders; they’re your family memories. If you haven’t lost them by accident or tragedy, consider yourself lucky. I was not so lucky. Since tragedy struck some of my family photos, I have been on a crusade to help others keep from suffering any kind of photo disaster.
If you are like me, you long for a simple* workflow.
*All your photos flow neatly from their sources into a single library, they are searchable and shielded from harm. You want to be able to print and frame your best photos, give them as gifts, and write stories around them as you prepare for your legacy.
How Did We Get Into This Mess? – A Brief Look-Back
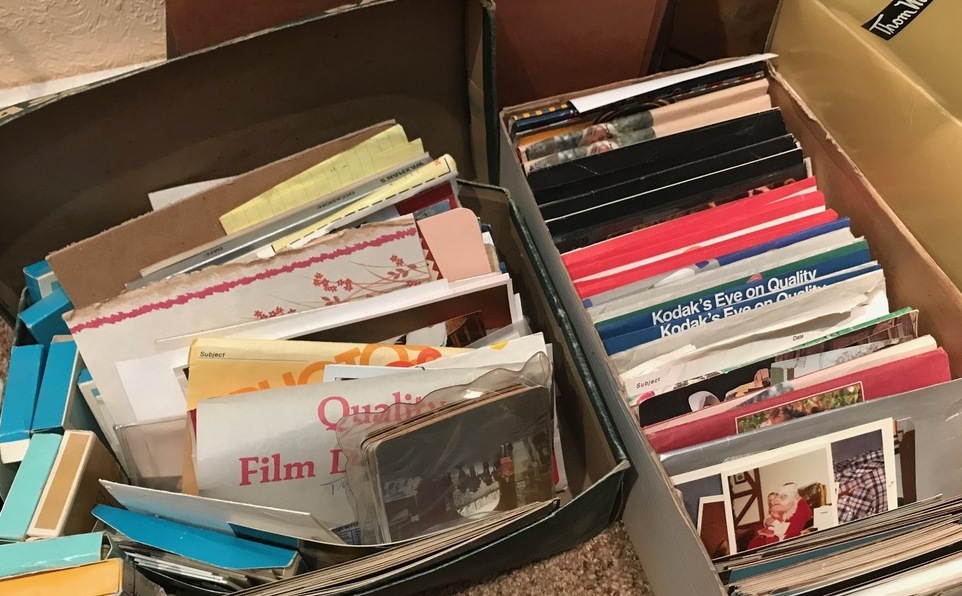 Perhaps you’ve inherited a collection of photos that look something like this. Maybe there are physical albums and scrapbooks, too.
- Many decades ago, printing film was relatively costly. Photographers snapped pictures with a critical eye. We had to be thrifty, astute and discerning, wary of taking meaningless photos.
- Contrastingly, when digital photography became commonplace, clicking the shutter hardly made us pinch our pocketbooks. We were quite suddenly able to capture the volume of images we see today.
Previous strategies left you with no plan for how to track, sort, or store your images, and make them quickly portable as part of an emergency plan.
- Old print photos are at risk of abandonment and disintegration.
- Digital photos are scattered haphazardly across our entire digital footprint.
3 Key Objectives of a Good Workflow
- Percolate
- Address your archives with intent to make waste of the meaningless and crown the priceless.
- Tag
- Understand that adding image metadata will help you find what you want when you need it.
- Follow through
- Save backup copies in different physical locations which will protect your treasures from those inevitable hardware failures.
Rule #1 – Take Baby Steps
One thing at a time. Don’t try to tackle organizing all at once, so you won’t get discouraged and give up.
Overall Strategy
- Assess your total storage size needs so you can safely put all your photos in one place
- Cull meaningless and bad photos from the ones you want to pass on to future generations
- Apply meaningful unique file names and add searchable metadata to EVERY image you save
- Create a workflow that efficiently automates new photos going into your catalog (appropriate folders)
- Backup your catalog of images to no less than two different locations
With a sense of the overall strategy, start by gaining a sense of what you already have.
Step One – Assess Your Storage Needs
- List where all your photos are located.
- Print/Developed Photos – By this I mean all paper, tintype, Polaroid, and heirloom photos. They might be in scrapbooks, wedding albums, baby books, movie film, slides, etc. We will get these scanned to digital eventually, but for this step, just list where they are located.
- Digital photos – Regard those scattered across all your devices and programs. Include sources such as email & social media, computer, tablet, phone, digital cameras, cloud storage, etc.
- Tally the storage space needed to hold all of your digital imagery
- Double that storage space estimate
- Dedicate, or reallocate, that amount of space – either on your local hard drive or by purchasing a new external drive. This space will become your primary digital photo repository.
- If you are balking at the price of allocating or purchasing the necessary space, think about it in terms of the value of preserving your priceless photos. The minimal cost is worth your peace of mind.
In Part Two of this series, I’ll talk about how best to move your digital photos from their various sources to that one location, and detail how to sort and create metadata for the images you save.