303-916-5996

Closeout The Year in 4 Easy Steps – no math involved

This before the New Year, I perform a ritual that helps me prepare to accept what the New Year will bring. I like to reflect and take stock of what just happened. Especially after a crazy year like the one we’ve just been through!

My four step method is an accounting but has nothing to do with math. Math was not my favorite school subject.

Why? Whether this has been one of the hardest or even if it has been a very positive year, this is the time to ask some of the deeper questions to help us step forward with confidence. Looking back helps me let go of the unimportant and move forward.

No, I haven’t kept a running list of my activity. I simply review my calendar entries. It always surprises me how much I have forgotten!

Even if you detest those holiday letters….It’s a good idea to assess your life’s journey before you head down the next road.

Am I headed down the right road?

Before I click the electronic page to January, or stick a pushpin into a new wall calendar, I do these four easy steps and I know I”m headed down the right road of the new year.

FOUR STEPS

  1. Take Stock of What Happened
    • Skim each month of the previous year’s calendar, not significant events
    • Note meaningful accomplishments from task lists
    • Review journal entries for a sense of prominent themes and where my gratitude has been focused.

  1. Ask These Personal Questions. Note Your Answers.
    • What were my biggest challenges?
    • How did I handle the unexpected? 
    • What have I learned?
    • Did I reach my most important goals?
    • What am I most proud of?
    • What am I ready to let go of?
    • How will I apply what I learned last year?
    • What are my new ideas and goals?

  1. Think about new intentions and jot them down.

  1. Lastly, Post the new intentions to a prominent place that I can see every day.  

That’s it! This little practice helps close the door on the old year. See what I’ve achieved and have a peek at what I want to do next.

“WELCOME, NEW YEAR!”

My wish is that your light shines brightly in the coming year!

All the best in love,

Kit

10 Creative Ways to Bring Memories into Splendid Spring!

Heading into Spring cleaning with fervor? Here are 10 creative ways to organize favorite treasures and share memories of the previous year or farther.


1) Create a Scene

– Save bits of a special vacation or activity inside a glass jar. Note highlights on paper or use ticket stubs, confetti, shells, sand, or cutouts.  At the end of the year, review favorite moments, photograph your scenes, then start a new jar.

2) A work of Art

– Create a bit of art or jewelry using a photo, child’s drawing or another memento.  Many sites offer ways to preserve a special moment in time for use in a functional, wearable, or artistic piece.  This sibling photo was enlarged and printed on fabric for making a pillow.

3) Make your own home videos or audio recordings

Of the many gifts that can be passed to children and grandchildren, few will be as meaningful or as impactful as the sound of your voice relaying what you feel is important to pass on.

4) Create your Own Site

Create a personal website, YouTube, or SoundCloud site to share photos, video, or audio with only your family or friends.

5) Memory Jars

–Display bits of beloved nature, a bird’s nest, or treasured item in a glass jar or cloche.

6) Create a Shadow-box

– Frame a short story or poem about a meaningful event.

Include memorabilia to honor a loved-one.

Maps can give a sense of place or movement.

7) Write Them Down

Keep a Journal or Notebook.

Insert photos or drawings that describe the story.

8) Use social media

Gather favorite photos and related short stories of your year.

Share them on Facebook, Instagram, or Tumblr.

9) Display Old Documents

Family history documents can make an eye-catching wall display, especially against a dark wall.  Envelopes and postcards yellowed with age, handwritten vintage letters or cards can be framed or arranged unframed.

Just be sure to use color photocopies rather than the originals.

10) Toys and Games

Find toys and games you played with as a child. Display them and write about your experiences with them.

Tell us:  What are your favorite ways to reveal hidden memory treasures?

Need help? Submit Your Comments, below. 

  • Professionals, like me, are available to help you get creative with your legacy stories and items.
  • Participating in group memoir workshops lets you hear what others are remembering and nurture your own memories.

Waking Up Memories

I love metaphors!  Like tree buds, our memory-energy is being stored up inside us.

Those Buds Were There All Along

Did you know that the buds you are seeing on deciduous trees in spring were formed during the previous summer, usually in August?

Why?  Trees are dormant during the winter. They don’t have the energy to grow those power-balls of life in dormancy.  The buds are not very apparent in the fall or throughout the entire winter. Yet, if you look closely, you’ll see these tiny structures even in the dead of winter.

Wake Up!

In the spring, buds swell and wake up!   Bud-break is the response to both markedly warmer days after cold winter temperatures and to longer daylight hours.

Seeing the trees and bushes flaunt fragrant flowers and green, glorious leaf-out in spring gives me a sense of hope and awakening from the darkness and bleak colors of winter.

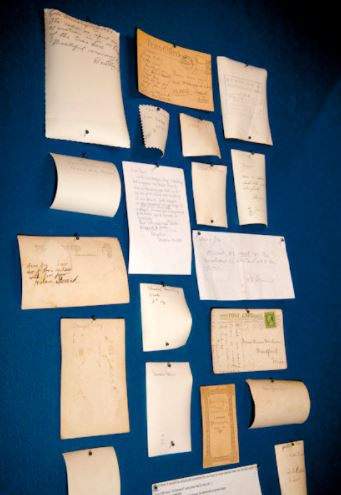
Memory-energy is waiting

We create and carry forward special memories all year long.  These are the relationships, thoughts, and moments that keep us strong and resilient.

Like the small buds of fall, our memories are waiting for the right environment to wake up and be celebrated! 

Celebrate Memories

So how do we nurture our hidden memories?   The most important thing is to let our memories break out of hiding and celebrate them. The key environment is where reminiscing is fun and easy.  Sharing them with family and future generations come naturally.  Journaling,  talking,  sending letters and cards, and organizing and taking photos are just some of the ways we can nurture memories. 

Tell us: What has helped you wake up family memories and be able to share them?   Was it participating in a birthday, or holiday celebration? Something else? 

In my next post, I’ll show you 10 Creative Ways to Prepare Memories for coming into Splendid Spring!

Managing Your Photo Collection – Part Two

In Part One of our series on Photo Management, we discussed the overall strategy of creating a workflow for organizing your family photos.    After designating one central storage space of the correct size, here are some tips on what to do next.

Step Two – Get Everything into One Photo Catalog

  • Create one folder on the one designated drive space.
    • Initially, this is your photo catalog.
      • Name the folder whatever you like: MyPhotoVault, or something you like.
  • Start moving your collections


  • Move only small amounts at a time.   Remember, you don’t want to get discouraged and give up.
    • Try working for only 15 minutes, or tackle just one month of photos at first
    • Put this short task on your schedule at a regular frequency that feels right for you.
    • It doesn’t matter where you start, but be sure to make a note of it, so you can come back to it later.  Maybe – the oldest month of photos on your local hard drive, or someplace like that.

Step Three –  Review the contents of your new folder

Now that you’ve designed your photo catalog and placed all your collections in it. Start to review your collection.

Realize that you are looking at these photos with a perspective you may not have had when the photo was originally taken.   It is possible that the image may have new importance, or you have gained new knowledge, especially if it contains something (or someone) that no longer exists.

Three Folders Are Best

As you cull what’s worth keeping, KISS it – Keep ISimple, Silly.  Make only three subfolders; anything more complicated is too much trouble.

  • Keep
  • Donate
  • Discard

BEWARE of Creating Extra Folders

  • Choose a catalog outline that works best for you and stick with it.
    • Folders by the year or by quarter might work well. Or you may discover a different design fits your needs.
  • Do not sort by person name. I have seen some people sort by family name with some success, but either of those methods can get messy, as you can imagine.
  • Read about best practices for naming files and folders. This will make finding what you want easy and efficient. One of my favorite filename convention outlines is here.

So, you might be asking: What if we don’t know the exact year the image was originally taken? How do we find the needle in the haystack – that one image of newly found importance when we want to locate it again?

Metadata to the Rescue!              

Finding your photos is where the value of metadata shines.  In my next post, I’ll be sharing how to assign metadata to your images that will stick with them when you move them around, so that you can search for and find what you want.

Managing Your Photo Collection – Part One

A Workflow for Finding and Preserving Your Images

Your photographs are not just files and folders; they’re your family memories.   If you haven’t lost them by accident or tragedy, consider yourself lucky.  I was not so lucky. Since tragedy struck some of my family photos, I have been on a crusade to help others keep from suffering any kind of photo disaster.

If you are like me, you long for a simple* workflow.

*All your photos flow neatly from their sources into a single library, they are searchable and shielded from harm.  You want to be able to print and frame your best photos, give them as gifts, and write stories around them as you prepare for your legacy.


How Did We Get Into This Mess? – A Brief Look-Back

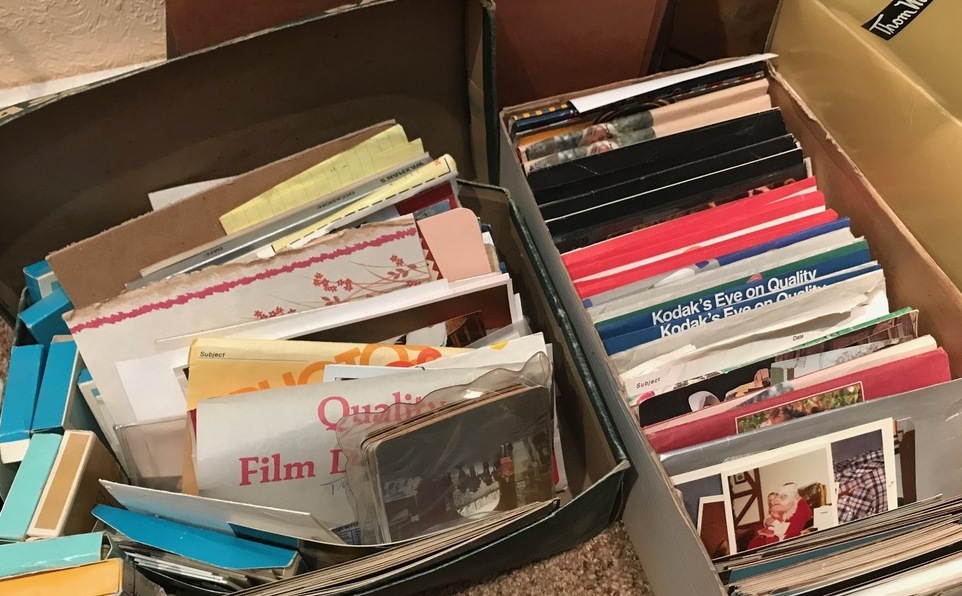
Perhaps you’ve inherited a collection of photos that look something like this.  Maybe there are physical albums and scrapbooks, too.

  • Many decades ago, printing film was relatively costly.  Photographers snapped pictures with a critical eye.  We had to be thrifty, astute and discerning, wary of taking meaningless photos.
  • Contrastingly, when digital photography became commonplace, clicking the shutter hardly made us pinch our pocketbooks.  We were quite suddenly able to capture the volume of images we see today.

Previous strategies left you with no plan for how to track, sort, or store your images, and make them quickly portable as part of an emergency plan.

  • Old print photos are at risk of abandonment and disintegration.
  • Digital photos are scattered haphazardly across our entire digital footprint.


3 Key Objectives of a Good Workflow

  • Percolate
    • Address your archives with intent to make waste of the meaningless and crown the priceless.
  • Tag
    • Understand that adding image metadata will help you find what you want when you need it.
  • Follow through
    • Save backup copies in different physical locations which will protect your treasures from those inevitable hardware failures.

Rule #1 – Take Baby Steps

One thing at a time.  Don’t try to tackle organizing all at once, so you won’t get discouraged and give up.

Overall Strategy

  1. Assess your total storage size needs so you can safely put all your photos in one place
  2. Cull meaningless and bad photos from the ones you want to pass on to future generations
  3. Apply meaningful unique file names and add searchable metadata to EVERY image you save
  4. Create a workflow that efficiently automates new photos going into your catalog (appropriate folders)
  5. Backup your catalog of images to no less than two different locations


With a sense of the overall strategy, start by gaining a sense of what you already have.

Step One – Assess Your Storage Needs

  1. List where all your photos are located.
    1. Print/Developed Photos – By this I mean all paper, tintype, Polaroid, and heirloom photos. They might be in scrapbooks, wedding albums, baby books, movie film, slides, etc.  We will get these scanned to digital eventually, but for this step, just list where they are located.
    2. Digital photos – Regard those scattered across all your devices and programs. Include sources such as email & social media,  computer, tablet, phone, digital cameras, cloud storage, etc.
  2. Tally the storage space needed to hold all of your digital imagery
  3. Double that storage space estimate
  4. Dedicate, or reallocate, that amount of space – either on your local hard drive or by purchasing a new external drive. This space will become your primary digital photo repository.
    1. If you are balking at the price of allocating or purchasing the necessary space, think about it in terms of the value of preserving your priceless photos.  The minimal cost is worth your peace of mind.


In Part Two of this series, I’ll talk about how best to move your digital photos from their various sources to that one location, and detail how to sort and create metadata for the images you save.